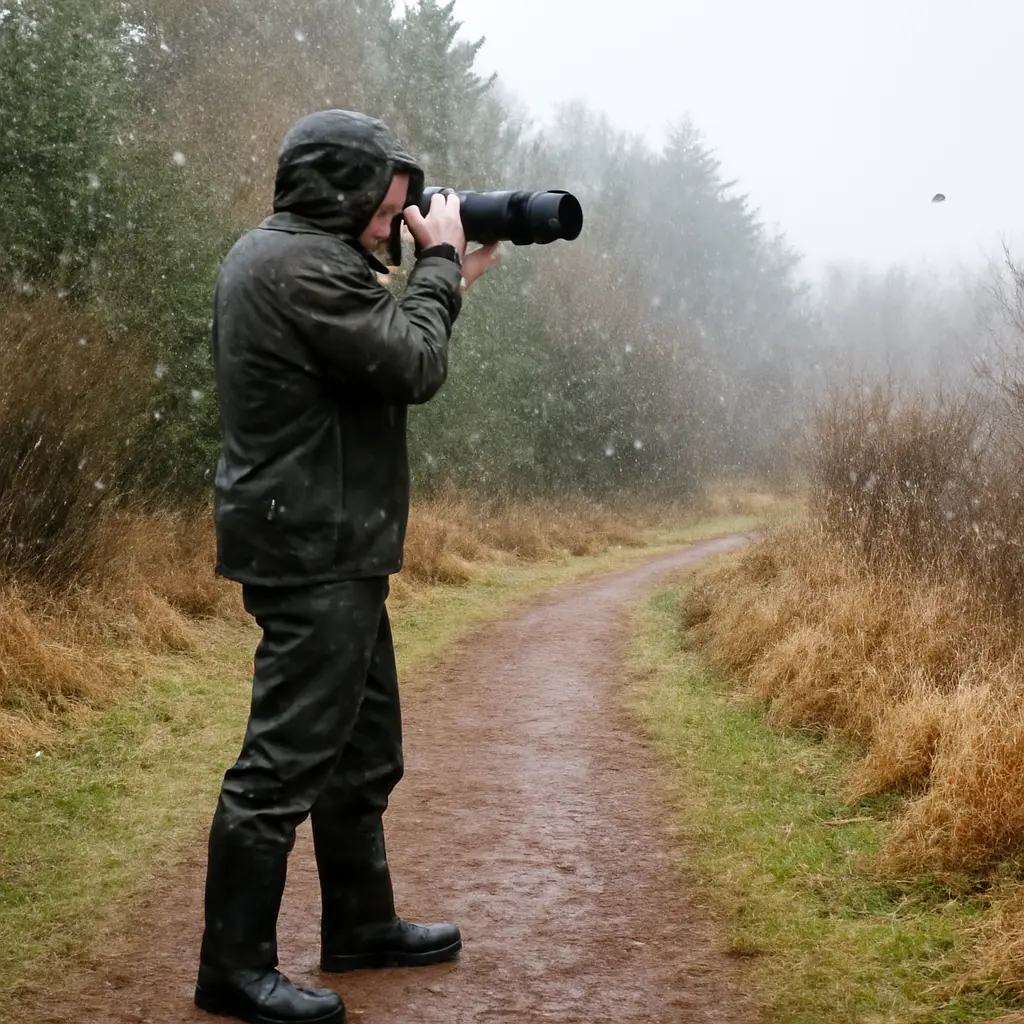
Wildlife photography in difficult weather is less about fighting the elements than understanding how they affect light, exposure, focus, and animal behavior. With weather-sealed equipment, sensible protection, and a flexible approach, rain, snow, wind, and fog can produce compelling images while remaining manageable for both photographer and subject. The National Audubon Society’s bird-photography guidance emphasizes patience and ethical distance; camera makers such as Canon and Nikon likewise recommend protecting equipment and adjusting technique to conditions. The key is preparation—not risking personal safety or disturbing wildlife for a photograph.
How tough-weather wildlife photography works
Tough-weather wildlife photography is the practice of photographing wild animals in rain, snow, wind, cold, heat, or reduced visibility while prioritizing safety, ethical conduct, and reliable image-making. There is no single technical recipe: the right approach depends on the weather, the species, the available light, and the photographer’s gear. The Royal Photographic Society’s nature-photography guidance and wildlife organizations commonly stress that animal welfare takes precedence over a picture.
Bad weather can change both the scene and the subject. Overcast skies soften contrast; snow can make animals stand out but may mislead automatic exposure; wind can shake long lenses and vegetation; and rain can obscure detail. These conditions are also opportunities: droplets, fresh snow, mist, and dramatic skies can add atmosphere. As a practical starting point, check forecasts and local advisories, carry protection for yourself and your camera, and be ready to stop if conditions become unsafe.
Weather and wildlife photography: the practical definition
In this context, weather-ready photography means adapting camera settings, field position, and equipment protection to environmental conditions without changing an animal’s behavior or habitat. It includes several related situations—wet-weather photography, cold-weather photography, windy conditions, and low-visibility shooting. Each calls for a different balance of shutter speed, aperture, ISO, stabilization, and shelter.
A useful field principle is to control the variable that matters most to the picture. For a moving bird, that is often shutter speed; for a stationary animal in dim light, it may be camera stability and noise management. A tripod or monopod can help support a heavy lens, but it cannot freeze a moving subject. Image stabilization can reduce camera shake, but it does not stop motion within the frame.
Prepare equipment for rain, snow, and cold
Equipment preparation is the first defense against difficult-weather failures. Weather sealing can help resist dust and moisture, but camera manufacturers generally caution that it does not make a camera or lens waterproof. Protection therefore means using a suitable cover, keeping exposed gear dry, and avoiding unnecessary lens changes in blowing rain or snow.
Rain and snow protection
A rain cover is a protective sleeve that shields a camera and lens from precipitation while leaving key controls accessible. A simple cover can be useful in light showers, while a purpose-built cover is more practical for sustained rain. Keep a microfiber cloth in a sealed pocket for the front element, and use a lens hood to reduce the chance of drops landing directly on the glass. In snow, brush flakes off gently rather than wiping grit across the lens.
Water can also enter during lens changes, so choose a sheltered place or avoid changing lenses when precipitation is blowing. After a cold, wet session, let equipment warm gradually inside a closed camera bag before exposing it to warm indoor air. This reduces the risk of condensation forming on or inside cold gear. Follow the camera maker’s cleaning and drying instructions rather than applying heat directly.
Cold-weather power and condensation
Cold-weather photography is a battery-management challenge as well as a comfort challenge. Lithium-ion batteries can deliver less usable power in low temperatures, so bring charged spares and keep them insulated in an inner pocket. Swap batteries when needed and return depleted, cold batteries to warmth; an apparent loss of power may partly recover as the battery warms, though it should not be treated as a substitute for carrying spares.
Condensation occurs when moist air meets a colder surface. The American Meteorological Society describes dew point as the temperature to which air must be cooled for saturation to occur; the same basic moisture process explains why cold equipment can fog when brought into warm, humid surroundings. Sealing the camera in a bag before moving indoors gives it time to warm more gradually. Allow the equipment to acclimate before opening the bag.
Adjust exposure and focus to the conditions
Exposure is the amount of light recorded by the sensor, controlled through shutter speed, aperture, and ISO sensitivity. In bad weather, the camera’s meter can be fooled by large bright or dark areas, so check the histogram and review important frames. The histogram is a graph of tonal values: a strong pile-up at the right edge can indicate clipped highlights, while one at the left can indicate blocked shadows.
Snow, bright skies, and exposure compensation
Fresh snow is much brighter than an average metering system expects, so a camera may render it gray if left to automatic exposure. Positive exposure compensation can help keep snow bright, but the correct adjustment depends on the scene and the camera. Review the histogram and highlight warnings rather than relying on a fixed setting; a dark animal against snow may require a different exposure than an empty snowfield.
Cloudy weather often produces soft, even light that preserves detail in feathers and fur. It may also reduce available light, so raise ISO or open the aperture when a fast shutter is needed. A higher ISO can introduce visible image noise, but a sharp, slightly noisy photograph is often more useful than a blurred frame. Modern cameras vary substantially in their high-ISO performance, so test your equipment before an important outing.
Shutter speed, wind, and subject movement
Shutter speed controls how long the sensor records light and is the main tool for freezing motion. Use faster speeds for running mammals, birds in flight, or animals moving in gusty vegetation; use slower speeds only when the subject and camera are sufficiently still or when blur is intentional. There is no universal minimum because motion, focal length, stabilization, and shooting technique all matter.
Wind can move both the camera and the environment. A stable stance, a firm grip, a weighted tripod, and a sheltered position can reduce camera shake. Avoid placing a tripod where gusts catch its legs or where stabilizing it would damage plants or disturb habitat. If branches are moving through the focus area, wait for a calmer moment or select a focus point that isolates the animal.
Autofocus in rain, fog, and low contrast
Autofocus systems need recognizable contrast, and fog, falling snow, rain streaks, or busy foregrounds can make it harder for a camera to lock onto an animal. Select a smaller focus area when the background is distracting, track the subject when it is moving, and consider manual focus if the camera repeatedly grabs branches or precipitation. Keep the focus point on a high-contrast part of the animal, such as the eye, when practical.
In fog, autofocus may hunt because distant edges lose contrast. A nearby subject can be easier to focus on, while distant animals may require patience and careful focus confirmation. Rain on the front element can create soft patches or flare, so inspect the lens periodically. Avoid wiping it while grit is present; remove loose particles gently before cleaning.
Use difficult weather to strengthen composition
Weather can become a compositional element rather than a problem to eliminate. Snow simplifies backgrounds, mist creates layers, rain adds texture, and storm light can separate an animal from its surroundings. The same conditions can also obscure the subject, so compose deliberately and preserve enough detail to make the animal the visual anchor.
Rain, droplets, and reflections
Rain photography uses precipitation as visible texture or atmosphere. Backlighting can reveal drops, while a darker background may make them easier to see. Reflections in puddles can create a second image of an animal, but low camera positions should be chosen without approaching nests, dens, or sensitive shorelines. A rain cover protects gear, but it does not justify staying exposed during lightning or flooding.
Snow, fog, and visual simplicity
Snow and fog can simplify a frame by hiding visual clutter and separating tonal shapes. In a snow scene, look for a clear contrast between the animal and its surroundings; in fog, use trees, ridgelines, or other layers to establish depth. Do not overexpose so far that important fur or feather detail disappears, and check the frame edges for distracting branches or bright patches.
A useful field exercise is to photograph the same subject at several distances and compositions: a wider environmental frame, a tighter portrait, and a detail such as tracks or frost. These variations tell a fuller story and avoid forcing a single image when visibility is poor. Where conditions make safe movement difficult, stay put and work with the scene already available.
Keep wildlife and people safe
Ethical wildlife photography means making images without causing harmful disturbance, stress, or habitat damage. The National Audubon Society’s bird-photography advice encourages photographers to avoid disturbing nesting birds and to use distance and patience. The U.S. National Park Service also asks visitors to observe wildlife from a safe distance and follow local rules; exact requirements vary by species, location, and season.
Distance, behavior, and sensitive seasons
If an animal changes its behavior because of your presence—such as repeatedly looking toward you, stopping feeding, calling, moving away, or showing defensive behavior—increase distance or leave. Never use food, calls, or other lures where they can alter natural behavior or violate regulations. Be especially cautious around nests, dens, young animals, and wintering wildlife, which may have limited energy reserves.
A long lens, binoculars, or a remote camera can help create photographs without approaching closely. Stay on established paths where possible, obey closures, and avoid trampling vegetation to improve a viewpoint. An image is not worth causing an animal to abandon shelter or spend energy escaping.
Personal safety in severe weather
The National Weather Service advises people to seek substantial shelter when thunderstorms threaten and to avoid exposed places, isolated trees, and water during lightning. In winter, hypothermia and frostbite are serious risks; wet clothing and wind can increase heat loss. Check forecasts and alerts, tell someone your route, carry appropriate clothing and navigation, and turn back when visibility, footing, or temperature becomes unsafe.
Do not shelter under a tree during a thunderstorm or continue shooting on exposed ridges, shorelines, or open fields when lightning is nearby. Flooded roads and trails can become dangerous quickly, and snow or fog can make route-finding difficult. A safe decision to stop is part of good fieldcraft, not a missed photographic opportunity.
A practical tough-weather field routine
A short routine reduces avoidable problems and keeps attention on the subject. Before leaving, check the forecast, access restrictions, and species-specific guidance. At the site, assess wind direction, footing, shelter, and the animal’s behavior before taking out the camera.
- Pack a weather cover, lens cloths, spare batteries, and suitable layers.
- Set a starting exposure and focus mode suited to the subject, then check the histogram and focus accuracy.
- Work from a respectful distance and use natural cover only when it does not damage habitat or trap you in an unsafe location.
- Wipe or protect the front element as needed, and keep spare gear sealed and dry.
- Stop when the weather, terrain, or animal’s behavior indicates that continuing is unsafe or disruptive.
- Afterward, let cold equipment acclimate gradually and clean it according to the manufacturer’s instructions.
Conclusion: tough-weather wildlife photography is manageable
Tough-weather wildlife photography becomes manageable when preparation, exposure control, composition, and ethical distance work together. Rain and snow call for equipment protection; cold requires battery and condensation planning; wind and low light demand attention to shutter speed, stability, and focus. Fog, clouds, and precipitation can also create distinctive images when they are used thoughtfully.
The most important measures are simple: check conditions, protect yourself and your gear, observe animals without changing their behavior, and be willing to leave. For further guidance, consult your camera manufacturer’s weather-care instructions, local wildlife regulations, National Weather Service alerts, and established ethical-photography guidance before heading into the field.
Sources: National Audubon Society, Bird Photography Tips, https://www.audubon.org/news/10-tips-photographing-birds; U.S. National Park Service, Wildlife Watching, https://www.nps.gov/subjects/watchingwildlife/index.htm; National Weather Service, Lightning Safety, https://www.weather.gov/safety/lightning; National Weather Service, Winter Weather Safety, https://www.weather.gov/safety/winter; American Meteorological Society, Glossary of Meteorology, Dew Point, https://glossary.ametsoc.org/wiki/Dew_point; Canon, Camera and Lens Care, https://www.usa.canon.com/learning/training-articles/training-articles-list/camera-and-lens-care; Nikon, Camera Care, https://www.nikonusa.com/learn-and-explore/c/tips-and-techniques/camera-care.